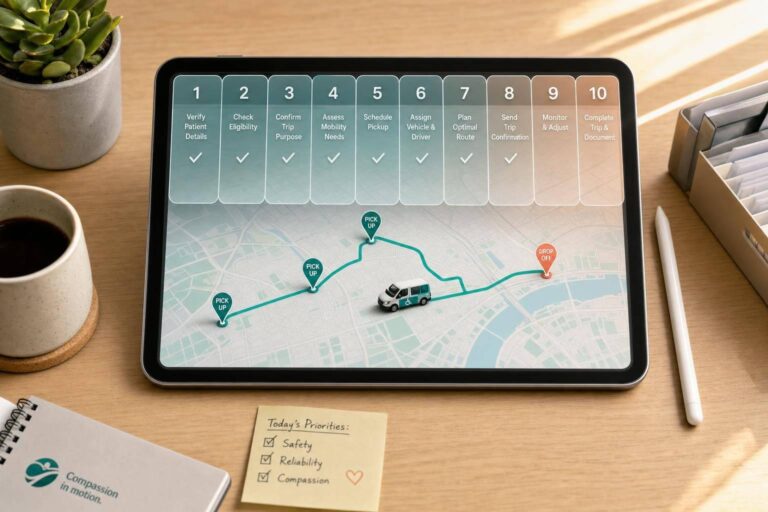
Most missed NEMT trips start with the same few problems: bad intake, missed eligibility checks, unclear pickup windows, or manual dispatch vs. software inefficiencies.
If I had to sum up this article in one line, it’s this: a 10-step scheduling process helps you cut missed trips, lower denied claims, and keep daily service under control. It walks through the full trip flow – from rider details and prior authorization to same-day changes, return trips, and end-of-day review.
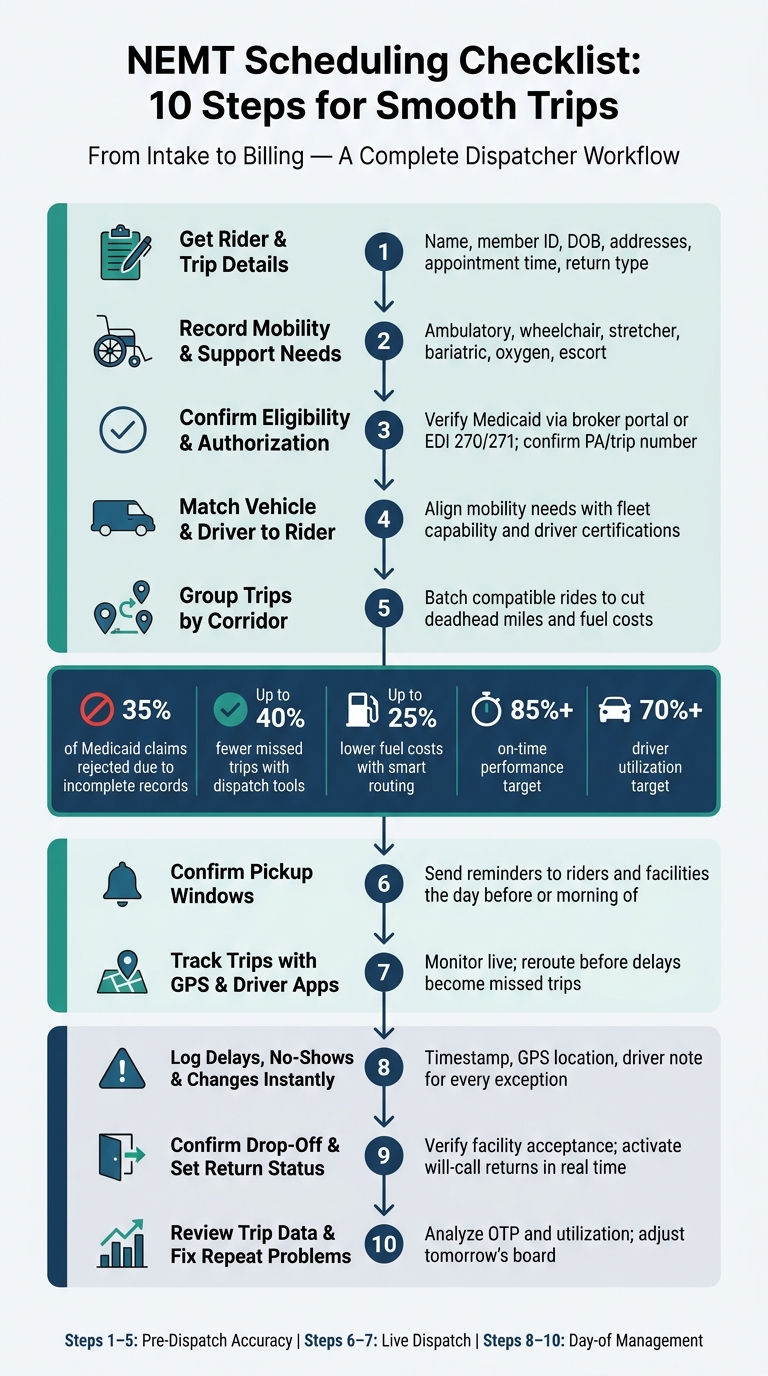
Here’s the full checklist at a glance:
- Step 1: Get the rider’s trip details
- Step 2: Record mobility and support needs
- Step 3: Confirm eligibility and trip authorization
- Step 4: Match the rider to the right vehicle and driver
- Step 5: Group trips by area when they fit
- Step 6: Confirm pickup windows with riders and facilities
- Step 7: Track trips with GPS and driver apps
- Step 8: Log delays, no-shows, and same-day changes right away
- Step 9: Confirm drop-off and set return-trip status
- Step 10: Review trip data and fix repeat problems
A few numbers stand out right away:
- About 35% of rejected Medicaid transportation claims tie back to incomplete records
- Dispatch tools can cut missed trips by up to 40%
- Good routing can lower fuel spend by up to 25%
- Teams should watch for at least 85% on-time performance
- Driver use should stay above 70%
This article also points to the trip data fields, software functions, and compliance records that help keep the process on track day after day. If you run NEMT dispatch, this gives you a plain process you can use from intake to billing.
NEMT Scheduling Checklist: 10 Steps for Smooth Trips
How Does an NEMT Dispatch System Work
sbb-itb-af83355
Steps 1 Through 5: Building the Trip Before It Goes on the Board
The first five steps set up trip accuracy before dispatch. Get these right, and you deal with fewer early-morning fire drills at 6:00 a.m. and fewer denied claims later.
Steps 1-3: Collect Rider Details, Check Eligibility, and Confirm Authorization
Step 1: Capture full rider and trip details. Gather the rider’s name, member ID, date of birth, full pickup and drop-off addresses, appointment date and time, needed pickup window, and whether the return is a fixed return or a will-call return.
Step 2: Record mobility and support needs. Note if the rider is ambulatory, wheelchair-dependent, stretcher-bound, or bariatric. Also record whether they need oxygen and whether an escort or attendant is required. These fields aren’t optional. If a sedan is sent for a wheelchair rider, the trip has already failed before pickup.
Step 3: Confirm authorization before dispatch. Check Medicaid eligibility in the broker portal or through an EDI 270/271 eligibility check before the trip goes out. Every trip needs a valid prior authorization (PA) or trip number, and recurring riders need current standing orders tracked before they expire. Catching a missing authorization at intake costs nothing. Finding that same gap six weeks later can cost the whole trip plus an appeal. Incomplete documentation makes up about 35% of all rejected Medicaid transportation claims nationwide.
Steps 4-5: Assign the Right Vehicle and Driver, Then Group Trips by Area
Step 4: Match vehicle and driver to rider needs. The rider’s mobility needs should decide the vehicle. Stretcher trips belong on stretcher-capable units. Wheelchair trips need a lift-equipped van with proper securement. The driver also has to hold the right certifications for the trip, such as a stretcher endorsement or CPR. In plain terms, the assignment has to match both the rider’s needs and what the fleet can actually handle.
Step 5: Group compatible trips by corridor. After each trip is checked and approved, group only trips that fit together on the same corridor to cut deadhead miles. This is a core part of NEMT fleet management to keep operating costs low. A simple example is two dialysis patients going to the same clinic. Software helps by flagging conflicts, matching vehicles, and surfacing shared rides on the same corridor.
Once the trip is matched and grouped, it moves into pickup-window confirmation and live dispatch.
Steps 6-7: Set Pickup Windows and Dispatch With Live Tools
After the trip is built, the job shifts to locking in the window and tracking the vehicle in real time.
Step 6: Confirm pickup windows with riders and facilities. Send a reminder call or automated text the afternoon before or the morning of the trip. That helps cut no-shows and opens up time to backfill trips. For facility pickups, confirm with the front desk so drivers aren’t waiting around for a rider who has already been discharged.
Step 7: Use live GPS and driver apps to monitor trips in motion. Once trips are on the board, real-time visibility gives dispatch a chance to reroute before a late trip turns into a missed one. If a prior trip runs long, dispatch can adjust the next pickup window before the rider is left waiting. Common platforms for this workflow include cloud-based vs. on-premise NEMT software. Automated dispatch tools can reduce missed trips by up to 40% and speed scheduling by up to 30%.
With the board set and trips in motion, the next job is handling exceptions like delays and no-shows.
Steps 8 Through 10: Managing Trips on the Day of Service
Once trips are live, dispatch is no longer about planning the perfect board. It’s about dealing with what goes wrong without letting the whole day slide off track. Steps 8 through 10 help you stay in control when delays, no-shows, and return trips start piling up.
Steps 8-9: Handle Delays, No-Shows, Changes, and Return Trips
Step 8: Document every exception the moment it happens. If there’s a no-show, late cancellation, or failed pickup, log it right away with a timestamp, GPS location, and a short driver note. That paper trail matters. It can help protect the trip from denied claims during a broker audit.
At this stage, trips are already moving, so small mistakes can snowball fast. That’s why same-day appointment changes need to go straight into the manifest as soon as they come in. Push the update to the driver’s app instead of calling, so the driver gets the change in the same place they already use for trip details. Do the same for cancellations, add-ons, and will-call activations in real time.
Step 9: Confirm drop-off and lock in return trips. When the driver gets to the facility, they should confirm the facility accepted the rider, not just that the rider made it to the door. There’s a big difference. For will-call returns, leave the return trip open until the rider is ready, then send the nearest appropriate vehicle to cut wait time.
Those exception logs don’t just help in the moment. They also give you the raw material for the end-of-day review.
Step 10: Review Trip Data to Improve Tomorrow’s Schedule
At the end of the day, review misses, delays, and deadhead miles to tighten tomorrow’s board.
Two numbers deserve close attention:
- On-time performance (OTP) of 85% or higher
- Driver utilization above 70%
If either one keeps missing the mark, this review is where you dig into the cause. Then use what you find to change tomorrow’s pickup windows, routing, and assignment rules.
Look for repeat patterns. Maybe one rider is never ready on time. Maybe a pickup window is too tight for a certain facility. Maybe a driver keeps getting trips outside their certification. Fix those problems by changing standing orders, adding buffer time, or updating assignment rules.
Tools, Records, and Metrics That Keep the Checklist Working
Data Fields Every Dispatcher Should Record for Each Trip
A schedule only works when the trip record is complete. If the record is missing details, problems tend to show up later – during billing, audit review, or same-day service changes.
Each trip record should include the rider’s mobility level: ambulatory, wheelchair, stretcher, or bariatric. It should also note escort or PCA count, any special equipment such as oxygen or a lift, and access details like gate codes or building entry instructions.
For billing and audit control, the record should also capture:
- broker authorization or trip number
- confirmed Medicaid eligibility status
- GPS-verified pickup and drop-off timestamps
- electronic signatures
- total trip mileage
This is where software earns its keep. If the system flags missing required fields at the time of booking instead of at billing, dispatch teams can fix issues early. That helps prevent denied claims and lost revenue. Once those fields are set the same way across trips, dispatch software can stop incomplete trips from ever reaching the board.
Software Features That Cut Manual Dispatch Work
Once the trip record is standardized, software can take a lot of the repetitive work off the dispatcher’s plate. Manual data entry slows down most NEMT dispatch teams, and the slowdown adds up fast.
Broker API integrations pull trip data straight from brokers, which cuts duplicate entry. Standing order templates can auto-generate recurring trips for dialysis or therapy riders, so dispatchers don’t have to key in the same ride week after week. That kind of repeat work is a time drain, plain and simple.
Multi-load optimization groups riders who fit the same corridor. Done well, that can reduce fuel expenses by up to 25% and lower per-ride costs by 30% to 70% through better vehicle use. Mobile driver apps also help tighten the loop. They send manifests, directions, and trip updates to the driver’s device, while GPS timestamps and electronic signatures flow back on their own for billing.
For small-to-mid-size fleets, another feature matters just as much: HIPAA-compliant data storage. Rider names and appointment details should not be sitting in non-secure personal calendar apps. That may sound basic, but it’s one of those details that can cause a mess if ignored.
Citations and Compliance References Used in This Article
The following sources informed the scheduling standards, compliance requirements, and performance benchmarks referenced throughout this article.
| # | Source | Relevance |
|---|---|---|
| CMS.gov | Federal Medicaid and NEMT compliance guidance | |
| NEMT scheduling automation resource | Auto preassign workflows, standing orders, and mobility matching | |
| SS Support Network Operations Team | Dispatcher productivity and on-time performance benchmarks | |
| NEMT industry dispatch performance data | Scheduling speed and missed-trip reduction | |
| Elite Route Dispatch | Trip documentation standards and live-manifest guidance | |
| NEMT industry transportation access and cost data | Fuel savings and on-time performance |
Conclusion: Apply the Checklist to Run Cleaner Trips Every Day
Use the checklist as a single workflow. Each step cuts down on avoidable delays, denials, and missed pickups, from missed eligibility checks to late arrivals and billing mistakes.
Watch 85%+ on-time performance and 70%+ utilization as your day-to-day signs that the checklist is doing its job. The post-trip review step takes today’s trip data and feeds it into tomorrow’s schedule. When operators monitor on-time rates, claim acceptance, and exception patterns, they can make small fixes that tighten the next day’s board.
Accurate scheduling and clear documentation help operators move more trips with fewer mistakes and cleaner billing.
FAQs
What’s the most common cause of missed NEMT trips?
The most common cause is manual scheduling. When teams rely on calls, spreadsheets, or back-and-forth messages, things can slip through the cracks. Human error, weak communication, and limited trip visibility often lead to late pickups and missed rides.
Another common issue is a mismatch between a rider’s mobility needs and the vehicle that gets assigned. For example, sending a wheelchair user in a sedan is an obvious problem, but it happens more often than it should. Cloud-based NEMT software helps cut down on these mistakes by keeping data in one place, flagging mismatches before they turn into trip failures, and giving dispatchers real-time updates.
How do I handle will-call returns without delaying other trips?
Keep will-call returns in a pending status until the passenger is set to go. Then your NEMT scheduling software can assign the trip to the nearest open vehicle. That cuts down on phone tag and helps dispatchers handle exceptions without rebuilding the entire schedule.
With real-time GPS tracking and automated routing, you can also spot chances to multi-load trips or work return rides into active routes without disrupting scheduled appointments.
Which trip data fields matter most for billing and audits?
The most important fields are the ones tied to clean, checked intake and trip records: patient identity, Medicaid eligibility, broker authorization or trip numbers, pickup and drop-off timestamps, patient signatures, and mileage.
NEMT scheduling tools also help make sure required CMS-1500 fields, service codes, and digital records for certifications and licenses are on file. That cuts billing mistakes and helps with audit compliance.